All posts by Sherry

Farmhouse

Farmhouse (by Coach House Designs)

I purchased this pattern at the CQA show in Vancouver in 2018. I remember struggling to find the fabrics shown on the pattern; they came from various shops, mostly in the US. In late fall of 2019 I started sewing and completed the first two rows of small stars on a quilting retreat with Stacia and Deloise. A journal entry from August of 2020 mentions the trouble I was having with the appliqué on the dresses. By March of 2022 the top was done.
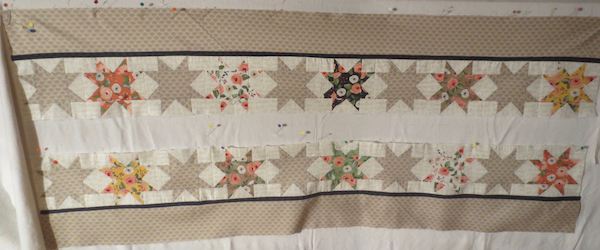
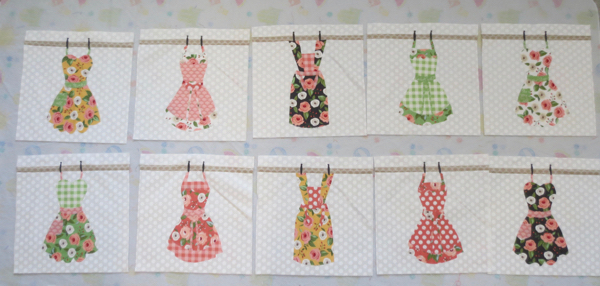
The project showed up on my UFO list for 2023, saying it was ready for quilting. As with many of my UFO projects it never got done. I turn over my UFO list in January every year so Farmhouse showed up again in my list for this year.

This June its number was drawn and I started quilting. It took all of June as well as July to get it finished. And even when I thought I was finished I realized I needed to add a sleeve in anticipation of it being accepted into the Guild’s 2025 quilt show. Sadly there was a lack of room and this one couldn’t be displayed.

It will be on its way to Kathryn this Spring.

Happy Birthday Christy

July 5, 2024

Pattern from The Polka Dot Chair

July’s mug rug involved hexagons which I love doing. It went together quickly and it reinforced how much I enjoy a hand stitching project.

It is much larger than any of the other mug rugs I have made but it will allow room for a cup of tea and one of Christy’s favourite doughnuts from Crumbl.

Japanese Maple Tree

30″ x 43″

This is my third sashiko project and, perhaps, my favourite. It was purchased after I did my cranes; I think I was looking to purchase more thread when I came across this one. A couple of years after I made the purchase I attended a Guild demo on the technique. The instructor was showing various threads for the stitching and she had some beautiful thread colours. I immediately decided that was how I wanted to work this project.

I didn’t have any specific sashiko threa colours in my collection (only white) but I had a couple of sizes of pearl cotton. In the end I only used a few colours as some of the others blended too much and wouldn’t have been a noticeable change.

When I thought I was done I discovered a black and white photo of the panel and realized I was missing a bit of the tree theme in the colours I had chosen to work with. So I went back to the drawing board and, thanks to Stacia, I was able to get the stitches in almost the same spots as the original.

I was at a loss as to what I would do with it when it was finished. It is long and wide and I really didn’t have a surface it could cover or a spot on a wall that it would fit. Thanks to taking down one of my less-than-favourite wall hangings on my ceiling I found a spot for it.

Wreath

I’ve been curious about yo yo’s for a while and picked out a much larger project to use them on. Past experience has taught me that I should start small if I’m using a new technique. I found this pattern online and, since I don’t have a spring/summer wreath for the door, I decided it would be a good teaching project.

Little did I know how quickly the yo yo’s would go together. Stacia sent me a yo yo maker which I used for the smaller yo yo’s. Between my friend and I we had five different sizes of yo yo’s to choose from; this wreath uses a mid-size and the largest size.

Although I used the maker for most of the yo yo’s there were times when I didn’t cut my stitching thread long enough and Gail showed me how I could finish them after they were removed from the maker – good information to have.

I found two wreaths at the thrift store for $1 each; Gail made one using Christmas fabrics. We were playing with the placement of the yo yo’s on the wreaths when Gail suggested we use the large-head pins to attach them rather than the glue gun. It made a perfect finish.